You’ve migrated to Google Analytics 4 before the deadline to transition from Universal Analytics, but did you know leaving the default settings can lead to missing data which can’t be recovered later?
It’s not enough to follow Google’s setup and migration wizard. If these key administration settings are not configured correctly to start, some data won’t be tracked and you’ll miss out on key insights. Unfortunately there’s no going back in-time with GA4, so it’s critical to change these settings in order to make the most of your GA4 implementation.
These are the most commonly overlooked administrative settings in Google Analytics 4:
Key Administrator Settings in GA4
Change Data Retention from 2 Months to 14 Months
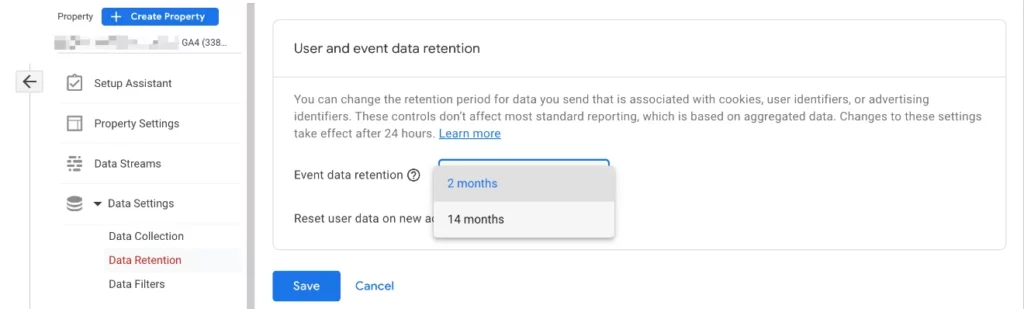
The default setting for data retention is 2 months. Google is trying to save storage space here. In most cases it’s best to increase the retention period to the maximum of 14 months in order to be able to compare data from year to year.
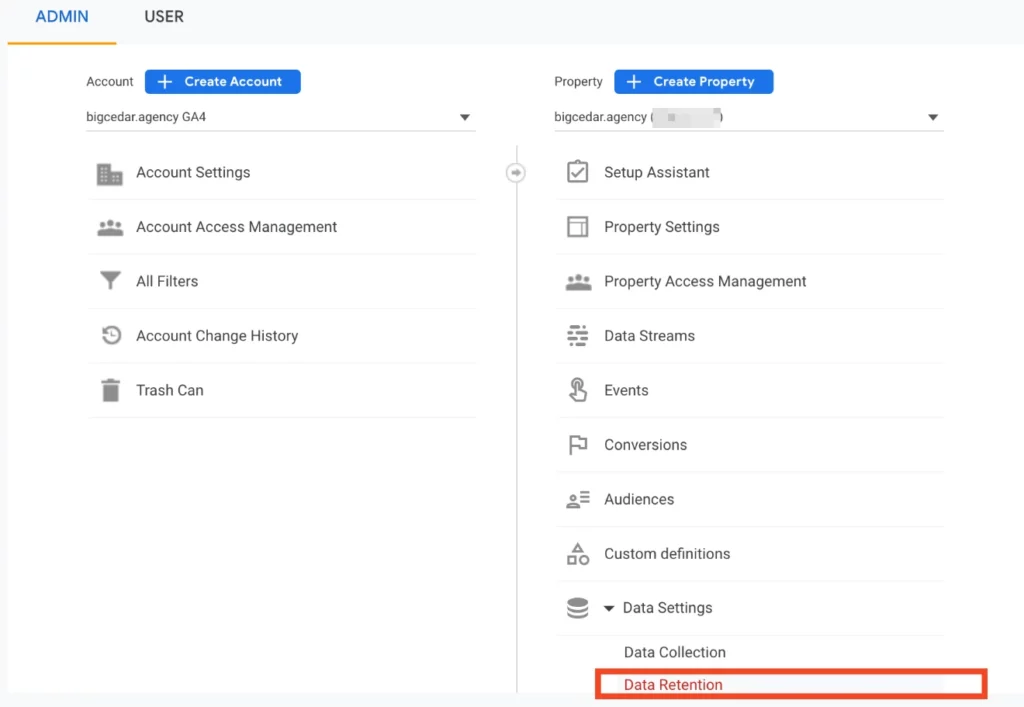
Navigate to Admin > Data Settings > Data Retention:
Select 14 months, leave the other setting to the default and save.
Further reading: Data retention – Google Analytics Help (Google.com)
Enable Google Signals Data Collection
Google’s answer to a cookie-less future, Google Signals enables cross-device tracking and reporting to get a deeper understanding of how users interact with your website.
By enabling Google Signals in Google Analytics, interactions across multiple devices and sessions are tracked better which can provide more valuable insights into the user’s journey. This can help in optimizing the cross-device experience by showing relevant ads to users at every stage of their journey.
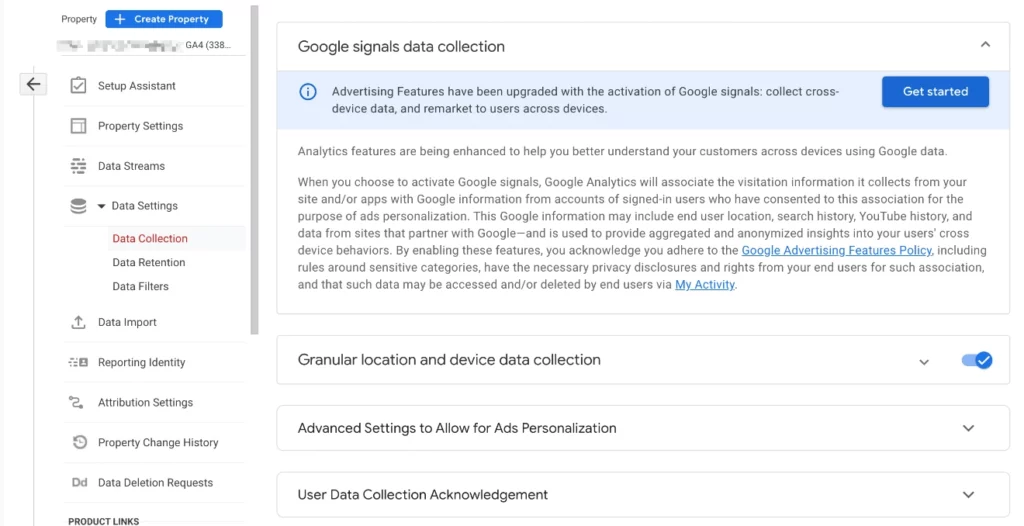
Go to Data Settings > Data Collection and click Get started:
On the next screen, click Continue to active Google Signals, then click Activate:
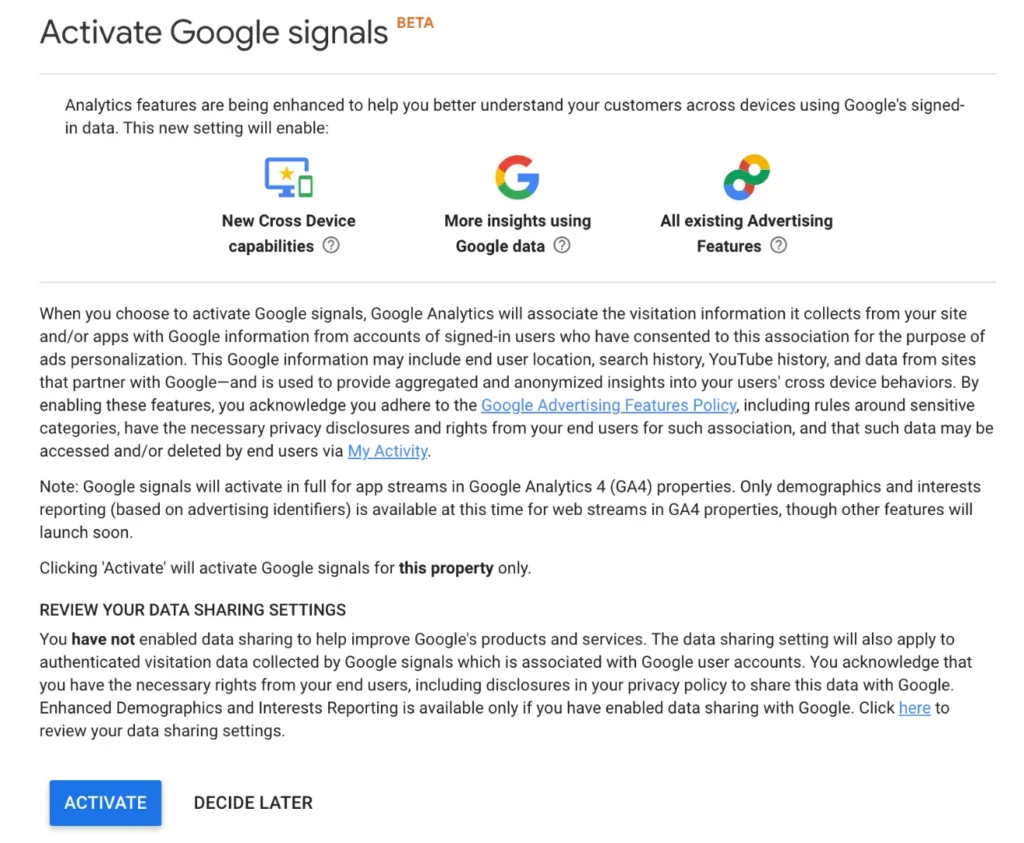
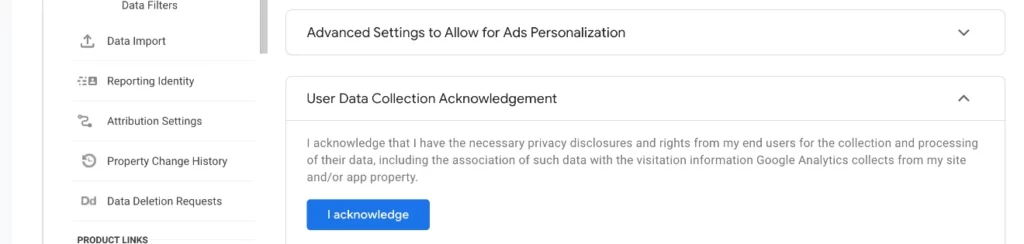
Note that if you’re setting this up for someone else, setup a screen share so they click “I acknowledge” under the User Data Collection Acknowledgement for liability reasons.
Also note that some reports that use this data may be limited by thresholding, which means that the information provided will not be at a highly granular level and will not allow for identification of individual users.
Further reading: Google Signals – Google Analytics Help (Google.com)
Link Google Search Console with GA4
Google Search Console (GSC) is the most reliable source for your organic search performance. Here you get the actual Google search keywords users are typing in that land on your site, and useful information like how many times your site showed up on the search results and how many click throughs.
You’ll see keyword-based performance reports without leaving Google Analytics 4 by linking it to your Google Search Console.
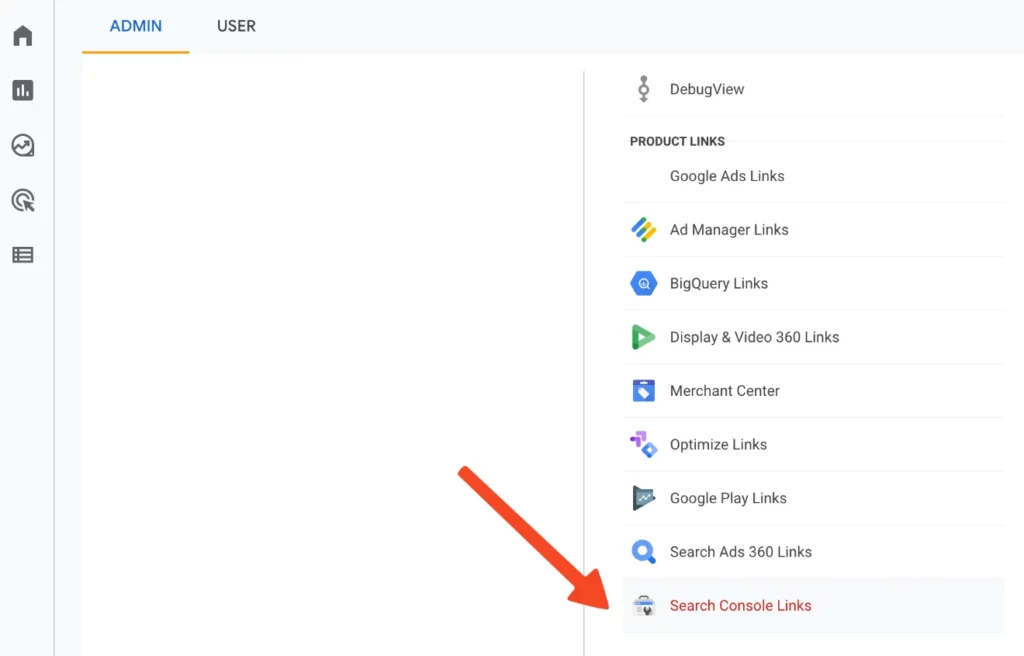
In Google Analytics 4 go to Admin > Search Console Links (under the “Property” column):
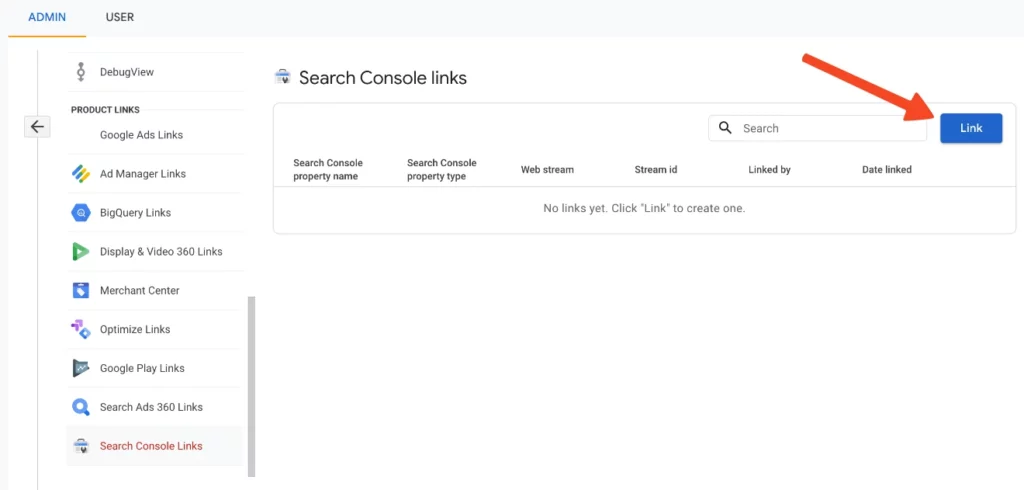
Click Link:
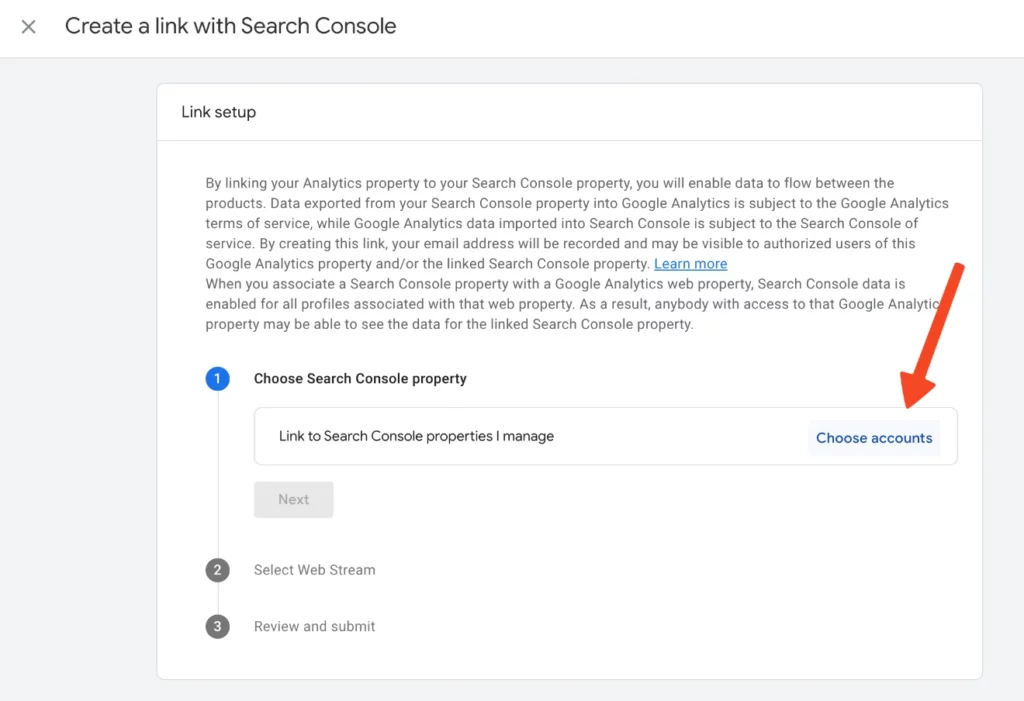
Click Choose accounts and select your GSC property.
Note: you must have editor or admin permissions in the GA4 property with the same email you used to verify your site in Google Search Console.
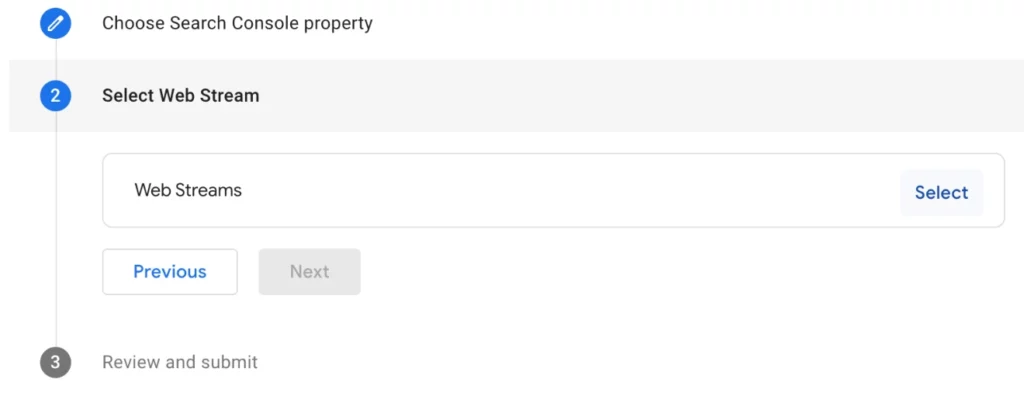
Next, select the Web Stream to link GSC to:
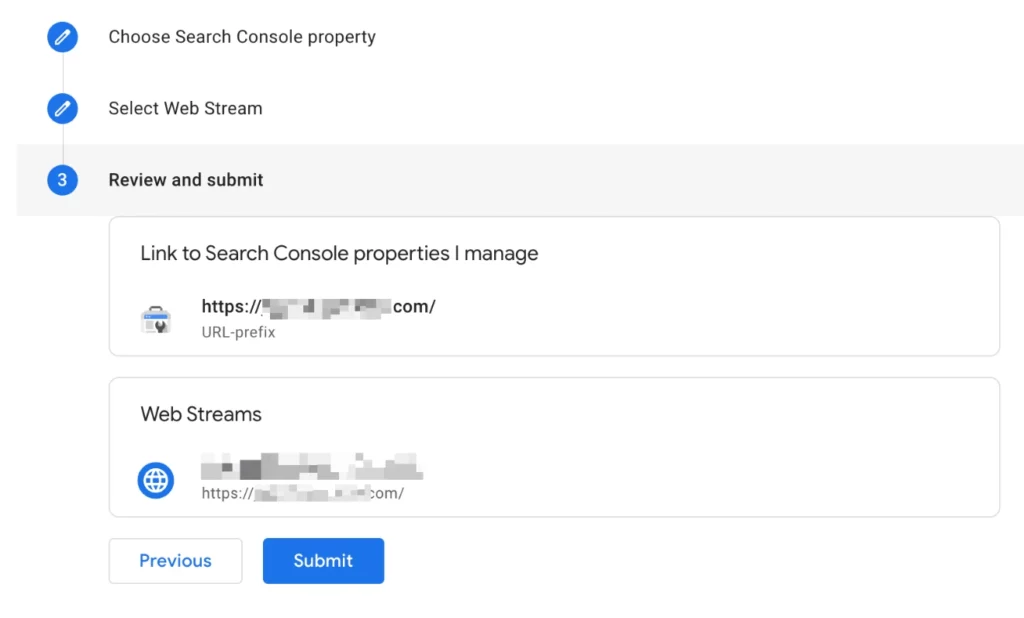
Review your settings, then Submit:
It’ll take up to 24 hours for data to appear under Acquisition reports.
To have quick access to GSC reports in GA4, you can go to Reports > Library and look for the Search Console widget. Click the 3 dots and Publish. When that’s done, you’ll see a new option in the Reports sidebar called Search Console.
Notice the new menu category “Search Console” with items underneath:
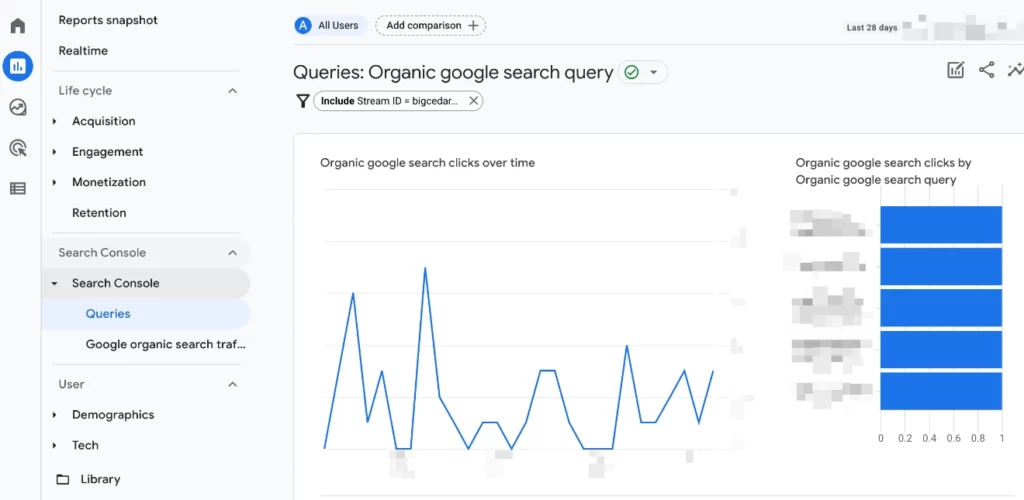
Now you won’t have to leave Analytics to access GSC data!
Link Google Ads with GA4
The steps to link Ads are very similar to connecting Google Search Console.
Go to Admin > Product Linking (under the “Property” column) > Google Ads > Link.
Select the Google Ads account to link to and click Confirm.
Note: You’ll need GA4 editor or admin permissions, and Google Ads admin permissions.
Loves Data has an excellent how-to video on this process.
Filter Out Internal Traffic by Adding Your IP Address
Have you ever looked at a traffic chart in Analytics and noticed a spike on a certain day? And then you realize that the spike coincides with the day your team was updating several blog posts, and it makes sense.
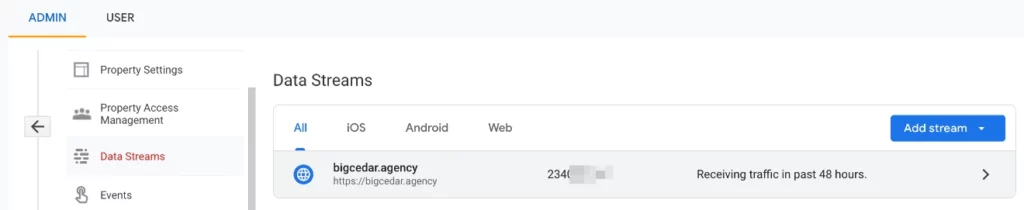
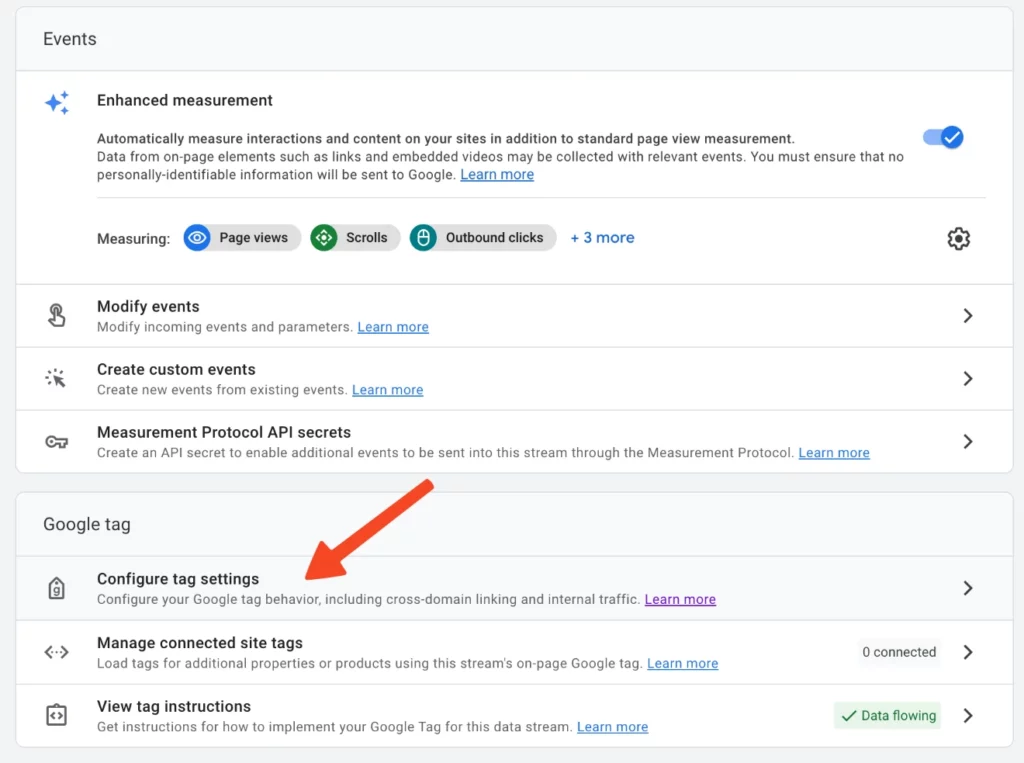
To avoid traffic from internal users muddling up your data, you’ll have to navigate deep in GA4’s admin options to Admin > Data Streams > Select your data stream
On the next screen, under Google tag select Configure Tag Settings:
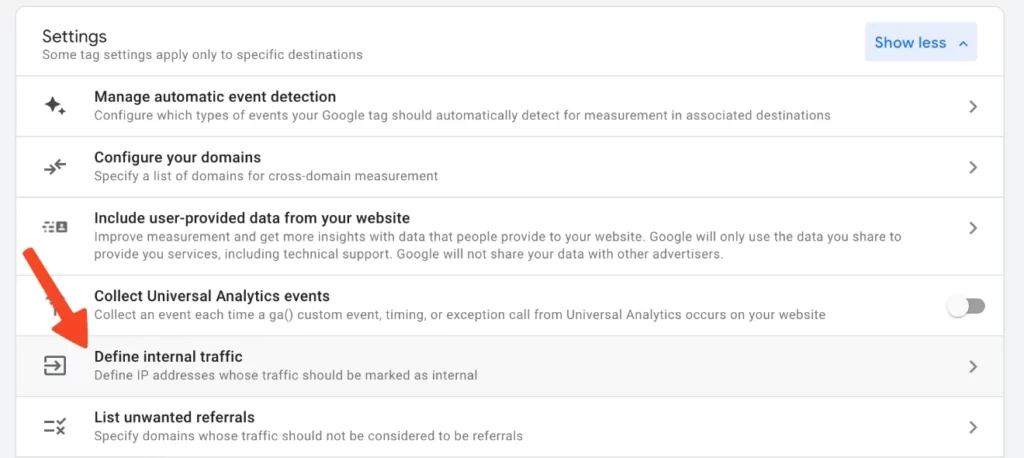
Under Settings click Show All to expand the choices:

Select Define Internal traffic (we warned you this setting would take some digging!):
Click Create, give your filter a name, select Match type “IP address equals” and enter the IP address (to get your IP, Google “what is my IP address”). If you know your IP range or want to use begins with / ends with operators, change the match type drop down and read more from Google’s support article.
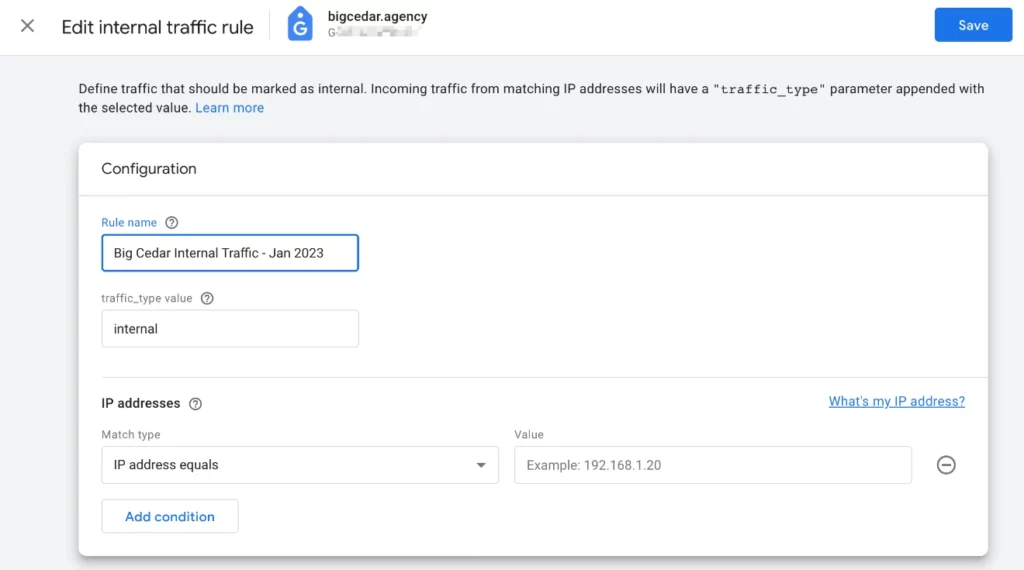
One caveat: most Internet providers assign dynamic IP’s. Here in Western Canada, the major Internet providers swap them around monthly, but there’s no hard rule. You can pay more for a dedicated IP, use a dynamic DNS service like No-IP, or make a note to check and update these settings on all affected analytics properties. It’s a hassle, but if you want clean data, it’s a necessary evil.
Here are two excellent how-to videos from Loves Data and AnalyticsMania (10-14min on YouTube) with more detailed explanations.
Final Thoughts
Now that you’ve set up the essential settings in GA4, you’re ready to learn more on how to get the most of our analytics setup. Need more GA4 help? Check out our Google Analytics 4 guide.
If you’re looking for customized help switching from Universal Analytics or using the recommended implementation via Google Tag Manager, we provide GA4 Migration and GA4 consulting services.